


The Lightsaber Sound Cookbook
July 18, 2007
 |
Ben Burtt's lightsaber sound effect, considered by many to be the greatest Star Wars sound effect of all time, is comprised of just a couple of steady humming sounds. The way they are combined, however, results in something spectacular. This is typical of many sound effects in Star Wars, and a characteristic of Ben Burtt's style. He often constructs his effects from diminutive elements, layering and sequencing simple sounds into an extraordinary alloy. Notably, since he builds sounds up from such simple parts, he retains control over every nuance of the mixture and therefore his sounds are also bestowed with a remarkable range of expression.
Unique to Ben Burtt's lightsaber sound design is a rather unusual recording technique. Wielding his microphone like a sword, twirling and swiping it in front of a speaker, he recorded real movements, turning the laws of physics into a signal processing system. This molded the waveforms into expressive gestures, as if he honored a vibrating larynx with a mouth to form vowels and consonants. Through this meticulous research and experimentation, the sound of lightsabers began to take shape and, expertly, the technique that brought it to life was hidden deep within its own brilliant illusion.
In this tutorial for creating original lightsaber sound effects, I have not only attempted to unearth Ben Burtt's design, but I have also embellished it with my own ideas, so this is a mixture of detective work, speculation and creativity. Some of you will use this tutorial as inspiration for new sound design techniques but I think the majority of you are interested in simulating lightsabers for your projects. Whatever the case, I suggest that the first time you experiment with it you do not get too wrapped up in trying to get a specific sound. The important thing is to get a good feel for the entire process, learning how the different steps contribute to the end result. After your first try, you will have a much clearer idea of how to proceed with the tone and texture of your lightsabers.
This tutorial is slightly advanced and assumes that you have prior understanding of multitrack recording and editing with such digital audio workstations as Protools, Nuendo, Sonar, Ableton or Vegas. You should also understand how to use audio plugins like equalizers and dynamics processors. It is not absolutely necessary that you own a shotgun microphone but in order to do accurate lightsaber emulations you should buy, rent, or borrow one. Refer to the glossary at the bottom of this page if you are confused by the tutorial's terminology.
Main Ingredients
When asked to come up with the sound of the lightsaber, Ben Burtt decided to use the humming sound of an old film projector. The projector housed two motors which vibrated at different frequencies, together producing a slow harmonizing pulsation. The interaction of these two tones is intrinsic to the way lightsabers sound when being swept around (lightsabers oscillate at a low frequency when idle and burst into a higher frequency when moving). These abrupt shifts in frequency are analogous to Doppler shifts of fast moving objects, therefore it sounds very natural for the lightsaber to change frequency when in motion. The projector motors sounded warm and smooth, providing a lot of body and motion. However, he wanted some high end electrical vibrance and low end girth. In order to give the lightsaber sound an electrical quality, he mixed in a sound which he discovered when passing his microphone in back of a television set called electromagnetic interference (EMI). This sound was emitting from the television's cathode ray picture tube (a.k.a. "CRT screen"). This purring sound forms the bottom end of the lightsaber sound and it also adds some vibrance to the high end.
 |
Waveform display of CRT EMI. The sharp spike at the leading edge of the waveform gives the lightsaber sound a lot of vibrance. The big bump after it makes the lightsaber purr like a kitty. The combination is what I refer to as "buzz" in this tutorial. |
My observations conclude that the motor hums were in the 90-100Hz range and the EMI sound was tuned down quite a bit to around 35Hz. Interestingly, the lightsabers in Episode IV are tuned slightly lower in frequency than the all the other films. I assume the pitch was eventually lifted so the lightsabers would be in tune with the music. So if you play an F# note on a piano while listening to the more recent films, the lightsabers will be in tune with it. But if you do the same thing while listening to Episode IV, the lightsabers will sound a bit flat.
If you mix the projector hum sound with the EMI buzz (lets say for now 90Hz for the hum and 35 Hz for the buzz) you get a good lightsaber tone. To be precise, it's actually 92.2486 and 36.4581 but it doesn't have to be exact. And that's it. These 2 waveforms are the main components necessary to create the general lightsaber sound.
Like me, you probably do not have the precise model of some obsolete film projector that Ben Burtt used to get the hum, in which case you can fake it. On my first attempts to emulate lightsabers, I recorded the vibration of electrical transformers. It worked pretty well, actually, and that's the method I mainly describe here. But if you're using another sound source, that's fine, the same methods apply. For example, you can draw the waveform out using an audio editor that features pencil drawing, like Sony Sound Forge, Steinberg Wavelab and Bias Peak. I'll show you how to do that a little later in the tutorial. In a real pinch, you could even use a synthesized triangle wave or filtered sawtooth to get this projector hum sound, adding some light chorus to give it movement, and then a narrow pulse waveform for the buzz.
For the buzzing sound you should not have too much trouble procuring an old television with a cathode ray picture tube. This waveform would be difficult to create accurately on most synthesizers but the closest approximation would be a very narrow pulse, slightly filtered. But if you are attempting to create an authentic lightsaber sound, you will be much better off not using synthesizers at all. One of the reasons that the sound effects for Star Wars are so unique is that synthesizers were used very little, which gave the sounds an organic quality. By recording CRT tubes, motors, and other physical things, your sounds have a more natural and realistic character and sound a lot more like they come from the Star Wars universe.
If you want to create an accurate rendition, I highly recommend using the movies as a reference. When I first started experimenting with this I used the Darth Vader vs. Obi-wan duel in Episode IV as a reference. I wanted to learn the original sound first, so that I could follow the way it evolved in later films. The lightsabers in Episode IV sound pretty muffled in comparison to the recent films. So all my first attempts sounded muffled as well. I suggest using the Luke vs. Darth duel in Episode V and all the lightsaber fights with Darth Maul in Episode I as references. Each of these scenes feature high quality lightsaber sound effects without background music. If you're references sound good, so will your emulations.
Hum
As you might notice, lightsabers change frequency and tone as they swing about. Someone recently described this characteristic sound to me as a combination of "wang" and "wong" sounds. The lightsaber hums are indeed of two types, each having slight pitch differences and a bit of textural difference as well. The pitch difference is one semitone. So if you played an F# note on a piano, then a G note, that's the difference; they are one piano key apart. The high frequency hum is generally a little brighter, and seems to imply a faster movement. The low frequency hum is a bit warmer and growly and together they have a "wang-wong-wang-wong-wang-wong" cadence. This is one of the most important things to understand about the sound. If we use 90Hz for the low frequency hum, that puts the high frequency hum at about 98Hz. On piano, that would be around F# for the low hum and G for the high hum. For now, we only need to be concerned with the low frequency hum though, so we'll need to create a hum at 90Hz.

|
|
"By 1917, there were more vibrators than toasters in American homes. Dozens of patents were issued for new designs between 1900 and 1940...Many vibrators of this vintage still survive; at least a dozen are usually for sale on eBay at any given moment." - History of the Vibrator, www.slate.com
|
|
To emulate Ben Burtt's projector motor recordings, try capturing a humming transformer in an old radio, an electric razor, an engraver or any other vibrating electronic device. You will need to record it with a decent condenser microphone so that you get a loud clean signal. I suggest moving the microphone around a bit so that the sound has some animation to it.
Pressing the device against another object may amplify and change the character of the sound substantially. For example, if an engraver sounds too high pitched and raspy, duct tape it to the inside wall of a thick plastic tote and put the cover on.
I had good luck with an old electric fan, feeding it just enough power so that the blade would not turn, which caused the transformer in its base to hum loudly. To induce some extra motion into the sound, I rotated my microphone around closely in front of it. Two one minute recordings were made which I had to bring down in pitch. Here in North America, transformers hum at 120Hz and in Europe 100Hz so if you are using transformer hum you will have to tune your oscillations from either one of those frequencies down to 90Hz. There may be some hiss in the recording, and if so use EQ or noise reduction or cut the high end a bit. You should end up with a steady hum at 90Hz, at least one minute long.
If your humming sound is too thin or does not have enough high-end, you can reinforce it using equalizers. It is important that you end up with a hum that sounds powerful and lively. This reinforcement should occur after you tune your recording to the proper frequency.
Buzz
 |
|
It may be necessary to play a video or broadcasted signal through the television in order to get a stable buzz at a fixed frequency. Don't forget to turn the volume down! |
If I were to demonstrate what frequency the buzz is at in comparison to the hum on a piano, I'd play an F# note and then go down 16 semitones until I reached a very low D note. That's where this buzzing CRT sound goes. If you play these two notes on a synth with some buzzy waveform (I just tried this on a Juno 60) it sounds kind of similar to a lightsaber idling.
For the buzz you should use an old television with a CRT screen, holding a microphone against the back to pick up the interference. It is possible to get this interference from a florescent light bulb but I found it to have too many crackly sounds and weird harmonics (not to mention that it also energized my Zoom H4 with an electrical charge that erased the card and nearly blew my fingers off). Many mics are very good at blocking out electromagnetic interference. A Rode NTG-2 shotgun mic pressed sideways against the back of a Zenith 25 inch television produced a very loud signal with just the right tone. However a Rode NT-1 barely picked up any interference at all, neither did the Zoom H4's built in mics. Try and capture about 1 minute of this sound to work with.
I read in Wikipedia that Ben Burtt may have recorded the EMI from an unshielded cable but I believe this is false because doing so produces a complex modulated tone unlike the buzz I'm describing. However, I found that this unshielded cable sound is a very nice addition to add in for some types of lightsaber sounds. But I'll get to that later in the tutorial.
You may pick up other sounds in the room and most likely this will include the high pitched squeal of the cathode ray which is around 15.7KHz. If your ears have lost high-end sensitivity you may not notice it, in which case you can locate it with a spectrum analyzer. Keep in mind this sound will cause headaches for people with good ears. Use a steep and narrow notch filter to get rid of this oscillation.
Once you have recorded this sound and removed the squeal, drop the pitch to 35Hz.
Idle
You should now have 2 waveforms: A hum at 90Hz and low buzz at 35Hz. Create 2 tracks in your audio workstation, one for each sound. Now you can work on the tone of your lightsaber and here is where the films will start to come in handy. Locate a section of a Star Wars film where you can hear a lightsaber up close and really bright sounding but not actually swinging around. Look for the most basic example of the lightsaber tone without dialogue or music mixed in. Create a reference audio file from this and load it into a 3rd track on your audio workstatation. You can solo/mute it when you need to compare your own lightsaber sound to this reference.
 |
|
|
The folks at Unidentified Sound Object have invented an elaborate system for creating lightsaber sounds with a Nintendo Wii remote, Open Sound Control (OSC) and Symbolic Sound Kyma. Check out the video on YouTube. |
Create a nice balance of the hum and buzz that closely approximates the reference. Make any necessary volume and equalization adjustments. You do not need to get this perfect yet, just mix it to taste for now. The goal, at this point, is not to emulate the lightsaber as it moves through the air. First we need to create a continuous oscillation that is somewhat faithful to a lightsaber that is not moving around. The movement effects will be created soon.
If you are way off base, you may want to go back and re-record or re-synthesize the hum or buzz. But try not to get bogged down with making it all perfect before you are familiar with the whole process. Just give yourself something to work with as you proceed to the next step.
The material you have at this point can be used to create a decent lightsaber idle sound. The idle is a piece of cake to make and, actually, you can get pretty creative with it and not loose the classic lightsaber vibe. I'll provide one simple method but this isn't the only way to do it.
In your workstation, load up the hum and buzz sounds on separate tracks and add an effects plugin to each track that will make the volume go up and down very slightly. Amplitude modulation is featured in tremolos, choruses, flangers, and panners and many other types of plugins. I sometimes use Waves Mondomod, disabling frequency modulation and stereo rotation to get a slow and subtle up and down modulation. Keep the effect light, you just want a touch of motion in the sound, not a rhythm. Because the hum and buzz have different harmonics, when they independently rise and drop in volume the mixture gains textural motion. Listen to your references and try to mimic some of the fine textural movements you hear when the lightsabers are idling. Make each plugin modulate at a slightly different speed and even add a few more of them in series to create a more complex modulation. You should end up with a subtle and irregular shifting of the sound that makes the resulting sound breath with life. When you are happy with the results, render out a minute or so and save it. You don't need this sound for the following steps, we're going to go back to the hum and buzz you made but do something completely different.
See link at the bottom of the article to preview some of my hum sounds, which you can hear mixed in with the sound library demos.
Recording Strokes
 |
|
The moving microphone adds a very subtle amount of Doppler shift to the signal. Nevertheless, I found that the Doppler shift only amounted to about one or two percent pitch shift. In all actuality, it is an effect that is hardly noticed unless you move the microphone extremely fast. The nice thing though is that we get it for free, with no plugin! |
|
Here is where things get fun, albeit a little more tricky. You will need a few more tools to do this right, including a shotgun microphone, a speaker, headphones, a good sound card and a new reference file or two (find some examples of lightsabers swiping around). A long shotgun is preferable, one having a narrow acceptance angle, but if all you can get your hands on is a short or medium length one (like me) there is a way to make it work which I will describe below. The speaker should have some low end but does not need a lot of highs. A full range cone is optimal but a two-way speaker will also work (that is what I used in this example) but you may have to keep the microphone further away from the cabinet to get a nice tone. You will need to play sound through the speaker and simultaneously record and monitor the microphone input. Therefore, you will need a soundcard with multiple outputs, preferably one that includes line level outs and a dedicated headphone output. A good alternative to this is to connect your microphone to a mixer, send the mixer output to your sound card and use the headphone output on the mixer to monitor the signal coming into the mic.
Set your speaker up in a quiet area, clear of obstacles, at about chest level and play the 90Hz hum sound through it. Turn off effects because you are going to animate the sound physically now and do not want to include processors in your recording. Your headphones should only be monitoring what is coming in through the microphone. The microphone signal should be going to a record track on your DAW. Before you make the recording, just get a feel for the way the hum sounds when you wave the mic around in front of the speaker, listening for problems. You may need to wrap a cloth over the microphone or use a shockmount to reduce handling noise. Also, consider taping the cable to your arm so that you do not bump or yank it. Listen for any extraneous sounds such as fan noise from your computer, breathing, footsteps, or cloth movement. Try to get rid of these artifacts because they will plague your lightsaber sounds.
Point your microphone at the speaker and adjust the input level so that you are not getting any distortion when it is capturing the full signal. Now move the mic around, pointing away and then directly at the speaker. Pass it by the cabinet quickly, then slowly, getting a sense for how to control the sound. Try pointing the microphone away from the speaker most of the time at an angle that provides the most rejection because you only want the sound to rise up now and then. Listen to your reference and try to get the pacing and movement of your swipes similar to what you hear in the films. (Keep in mind, Episode IV features longer strokes and the more recently made films have shorter, more aggressive strokes.) Remember that you are only hearing one half of the sound now, just the hum.
When you think that you are ready, make a recording. Perform a wide variety of movements so that you have a lot of material to choose from when you edit. A good lightsaber sound library will include lots of variants on the most useful sounds. Do the same with the buzz and save your recordings to separate files.
After recording the low hum at 90Hz, change the pitch of it one semitone higher to about 97Hz, increase the mid-range frequencies and drop the low end a bit. This is the high hum and you want to record this into the shotgun microphone in the same way as the low hum. Save the recording.
One problem you may notice is that the doppler effect is not very pronounced. I discovered that most lightsaber strokes from the films have doppler pitch shift of 30 to 80 cents. I also found that in order to produce long enough strokes, my microphone had to be moving about 5 to 10 feet per second. That only gave me about 15 to 25 cents of pitch shift, depending on the micophone's distance from the speaker, angle and general path. I had to swing the microphone at speeds of 20 to 25 feet per second to hit the desired pitch shift but the strokes seemed too abrupt when doing so. The easiest fix was adding some extra pitch shift later on. That was actually pretty easy. I'll touch on this in a moment.
Another issue is that the sound doesn't change all that much from stroke to stroke. Not like in the films anyway. The main way to remedy that is to create lots of different kinds of hums and record them with the microphone one at a time so you get some variety. That can be time consuming so don't attempt it yet. I was able to make decent lightsaber sounds on my first go with a single hum.
I am not sure if Ben Burtt recorded the high and low strokes in one pass by waving his mic around in front of two appropriately placed speakers. My Rhode NTG-2 shotgun mic does not have enough side rejection to allow this to work (the sound from each speaker would mix together too much). Therefore I have no choice but to record each frequency separately. This seems to works fine though.
Now you have three new recordings of lightsaber sounds created with microphone movements — low hum, high hum, and buzz. Next, we'll need to cut them up.
Cutting and Mixing
If you're eager to hear the results, this is a good point to do a preliminary mix of a lightsaber in action. So create 3 folders and label them "low", "high" and "buzz". Using the 1 minute long recordings you made when moving the microphone around, isolate a handful of the most interesting movements and save those out as separate files in the appropriate folders. About 10 strokes from each file, with lengths of .3 to .5 seconds (for a total of 30 samples) should be enough. You'll want to fade the starts and ends so they start from silence, come to full volume, then fade out completely. Be sure to normalize them so they are all at about the same relative level. Now you have what's needed to create the most basic lightsaber battle...Minus the clashing sounds but we'll get to that in a minute.
 |
A single stroke, recorded with a shotgun microphone. The head and tail of the file have been faded out and the sound has been normalized to -1dB. |
To make the strokes a little more aggressive, I suggest enhancing the doppler effect by adding some pitch shift. This can be done with just about any audio editor and most DAW's. What's most important to emulating doppler effects is the shape of the pitch envelope. For an average lightsaber strokes, the pitch be .35 cents high at the beginning of the waveform and hold at that frequency until stroke reaches its loudest, then shift to -.35 semitones and hold steady at that frequency to the end. The shifting of frequencies should occur over a period of about .05 seconds. Again, this is for an average stroke. These values should change according to the speed of the stroke.
Start a new session in your DAW with four empty audio tracks. On the first track add some high hums, and on the second track some low hums. Make them alternate so they go high-low-high-low, but also switch it up now and then so you get a couple of lows or a couple of highs in a row. The buzz sound should be on the third track and (this is important) mix it with the low hums at varying amplitudes with each stroke. Never mix it with the high hum. Use the fourth track for your idle sound, which should be on at low volume throughout and attenuated when the lightsaber is swinging around a lot.
Impacts and other Details
Clashes:
For the blades colliding, look no further than electrical zaps. Unless you already know how to create these sounds, I am going to recommend that you use commercial sound effects libraries. Sounds like 'Electric Zap Heavy Z HIT031001' from Hollywood Edge will do the trick. If you're brave, it is possible to create these sounds using car batteries. Check out epicsound.com for more information.
 |
|
|
When experimenting with dry ice sounds, keep a container of warm water handy to warm objects back up. Cold metal doesn't react as well. Wet metal also adds a nice fizzy sound! |
Lockups:
For lockup sounds, when the blades are pressed against one another, try pressing warm metal objects into dry ice. This effect can be heard in the films and with a little time and experimentation it's not a difficult sound to emulate. Dry ice can be purchased for about 10 dollars per pound and a block this size will last an entire afternoon.
Something I have been adding into some of my lockups is the sound of an engraver. I attach a contact microphone to a Dremel engraver, turn it on full blast and push the tip onto a thick metal surface. The sound that ensues is brutal and just the right thing to suggest the blades repel each other aggressively even when forced together. You can hear this effect in the demonstration at the end of this tutorial.
Even if you're trying to emulate lightsaber sounds exactly, don't be afraid to throw your own crazy ideas at it and make it sound unique.
Ignitions and Retractions:
For the blade ignition and retraction effects, you can be very creative as these vary quite a bit in the films. I found that the sound of a solid fuel rocket launch is a good starting point, as is a credit card sliding across plastic laminate (such as Formica), or even chalk on a blackboard. If you bend the pitch of these sounds upward it sounds like an ignition and the same sounds in reverse work for retraction. A zipper sound, like the kind on a sleeping bag, adds a nice touch at the end of a retraction.
Tips and Tricks
So far, we've covered the basics of creating lightsaber sounds. if you want more than a primer, read on and I'll share some special techniques that will help you achieve a more authentic sound.
Experiment:
Get a feel for how the different sounds can be used together by mixing them, putting them in series, dragging them forward and backward in time, etc. I find that it is best to start with power ups and idles, then work in the strokes, then the accents, and finally the clashes. These are recommendations only, and should not keep you from recognizing your own techniques. After playing around a bit, you may realize that you are lacking enough variations on some sounds, in which case you should flesh out your library more.
Keep things Shifting:
Remember to refer to your film reference, listening to and watching the way lightsabers sound when swinging around in a battle sequence. Try to identify the idle sound, the high and low strokes, and the buzz, paying close attention to the way these sounds interplay. Sometimes when a lightsaber starts to swing the high hum resonates to full volume and halfway through the swing the low hum takes over. This can be achieved by superseding a high hum with a low hum. The pitch of the strokes often go above or below their default frequencies, especially during suspenseful action, creating discord and edginess. You can create this effect simply by adjusting the pitch of certain samples up to plus or minus a semitone or even a lot more. In an idle state, the pitch is stable but occasionally its texture intensifies, especially when the duelists approach each other. To do this, simply increase the level on your buzz, raise the pitch a bit, or mix in a more aggressive low hum.
Make it Cohesive:
Obviously, the mix should sound cohesive, that is, one should not know that they are listening to layered and sequenced samples. The high and low hum should interplay in such a way they form one composite oscillation, rather than sound like two different sounds playing in sequence. Sometimes, the best way to achieve this is to see-saw the amplitude; make the high strokes loud, and simultaneously drop the level of the low strokes and vice versa. Also, try not to layer high and low strokes on top of one another. Always try and flip-flop between them.
Keep it Simple:
When you are creating the sound of two lightsabers, you need to be careful not to layer too many sounds together. For example, if you had 2 high strokes or a high and a low stroke sounding at the same time (1 sound for each lightsaber in motion), it can sound cluttered. In order to give the mix punch and clarity, use the least amount of sounds possible and avoid layering like-sounds. If two lightsabers are swinging at the same time, the sound of one stroke may do.
Add Reverb:
For added realism, especially with indoor battle scenes, you should apply some reverb to the mix by setting up an effects send on each track. Generally, the clash sounds will require the most reverb. Spreading the different sounds to the left and right also helps, as does a bit of stereo panning motion on the strokes. Ultimately, when your sounds are synchronized with video and mixed in with foley, special effects and music, the genuineness is hugely intensified.
Add Distortion:
When a lightsaber swings aggressively, the strokes
should sound more fierce and electrifying. Check out the stroke sound when Darth Maul gets cut in half. A quick and effective
technique is to simply run your hum through a distortion plugin such as
iZotope Trash. Trash will really allow you to change the personality of
your lightsaber sounds and is especially good at energizing weak strokes.
Draw the Waveforms:
It can be difficult to get an authentic lightsaber tone using things like televisions, cell phone vibrators, transformers or what have you. Especially if you're not very experienced at foley recording and signal processing. There is another way. You can draw the waveform out using an audio editor that features a pencil tool. Figuring out exactly what waveform to draw can be confusing at first but if your editor allows you to draw the sound out and hear the changes simultaneously, it's not hard to zero in on it. Start with a clip that is the right length for the desired frequency (90Hz would be about .01075 seconds long), then draw out a single cycle sine wave and start tweaking. Sooner than you would probably expect, you'll come up with a humming or buzzing sound that is reminiscent of a lightsaber. Take that waveform and send it through your speakers to capture the strokes. This is also a good way to come up with a lot of variations to your lightsaber stroke sounds. When you come up with a waveform you like, tweak it slightly and capture a new set.
Blue, a plugin synthesizer designed by Rob Papen, features the ability to hand draw waveforms and then sculpt them much further with powerful modulations. If there's any synth out there that can handle lightsaber sound design with ease, this is probably the one you want. I've just begun to scratch the surface of what this synth can do, and I'm convinced it could be the heart of an interactive DSP generated lightsaber. At least for all the hums and buzzes.
Expand the Collection:
You should have high strokes, low strokes, fast strokes, slow swelling idles, subtle flicks and all sorts of sounds that you created by twirling the microphone around. Whatever you created, use a naming convention that will make it easy for you to find sounds of a certain character. If you are making sounds for different types of lightsabers, such as battlestaffs, lightwhips or short sabers, consider separating them into different tone sets. Also, every time you make recordings for lightsaber sounds, you will undoubtedly come up with sounds of a completely different character. Therefore you may also want to create sets based on subtle differences in tonality.
 |
|
|
If you need to adjust the dynamics of your lightsaber strokes, check out Crysonic Spectra C1, a simple and effective compressor/ex- pander plugin at a budget price. |
Expand the Dynamics :
Lack of side rejection in my Rhode NTG-2 shotgun microphone gives me slight problems when capturing the stroke sounds. A long shotgun would do a better job of reducing off-axis sound, enabling more defined strokes. A way to remedy this is to run the stroke sounds through an expander, which is basically the opposite of the more popular processor known as an audio compressor. Whereas a compressor makes loud sounds quieter, and quiet sounds louder, an expander makes loud sounds louder and quiet sounds quieter. In some ways, adding this increased dynamic range simulates the way a long shotgun microphone behaves, making the off-axis sounds very quiet and the on axis sounds loud and present. If you do not have a long enough shotgun or would simply like to enhance your dynamic range, this is a decent solution. You can do this by making the ratio value on your compressor less than 1:1. A ratio of 0.5:1 will work, so that when the input signal exceeds the threshold setting, the output increases in volume by 50 percent. Be sure to reduce the output volume to prevent the signal from clipping. Dynamic expansion effectively makes the lightsaber sound quiet when the speaker is off-axis from the mic and at full volume when the speaker was directly in the microphones path. The end result is that the strokes will sound more punchy.
Filter Strokes Dynamically:
A symptom typical of directional microphones is muffled off-axis frequency response. This not a desirable trait for most recording purposes but for lightsabers this adds an extra degree of animation to the sound. When the speaker is on-axis the filter is open and off-axis the filter is closed, giving the lightsaber, for lack of a better description, a "wrroww" filter sound. The more side rejection the microphone has, the more pronounced the effect. If you are not getting enough of this, you can use what is called an envelope filter, which is basically a lowpass filter with a cutoff frequency controlled by the input level. A 12dB per octave filter (this is also called a 2-Pole filter) works well. Set the envelope attack to a fast setting like 25ms and the decay to somewhere around 325ms.
This functionality is included in such plugins as PSP Nitro, a modular VST plugin with powerful envelopes and several 2-Pole filter types. You can perform this process to individual samples, but I suggest adding the effect to your stroke tracks during the mixing and editing stage because sometimes you want the filter just to stay open. I like to turn this effect off for slower and quieter strokes.
 |
||
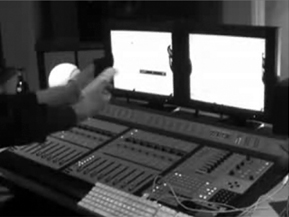
| Steinberg Nuendo (pictured) is one possible platform to create lightsaber duel sounds on. If you are new to audio editing you might consider Sony Vegas, a workstation far easier to learn. Both of these programs feature video import. |
Summary
Once your lightsaber sound library is fleshed out and you know how to use it, the process of mixing a duel is fairly straightforward. Most of the work should go into the library creation so that when it comes time to mix, you are able to control the sounds as expressively as a musical instrument.
Creating a comprehensive set of original lightsaber sounds offers tremendous opportunities for sound designers working on Star Wars projects. One of the best rewards is owning the rights to sounds. Additionally, the samples you create are broken down into layers which can be mixed together in numerous ways for different results - this cannot be achieved with movie or video game sound clips. As well, the samples contain no unwanted reverberation, footsteps, voices, breathing, background machinery or music. Having truly isolated lightsaber sounds allows unlimited flexibility when piecing together all the details of a combat sequence. Also, your work will sound uniquely different from people using the same old widely distributed illegal samples ripped from particular parts of the Star Wars films. And lets not forget that having an understanding of the techniques described here, will enrich your understanding of sound design.
Keep in mind, you don't have to do ALL of the things I've described to get a good lightsaber sound. My personal goal with this project is to learn how to create sounds that are faithful to the original lightsaber work of Ben Burtt. But one of the best things about the sound is that it's open to further exploration. For example, sound designer Mathew Carauddo created sounds for a replica lightsaber sound board (Plecter Labs Crystal Focus) based on metal swords and wind. This transports the listener to a very different environment than Star Wars, but capability is there to make the sound as compelling.
Terms
Hum: The fundamental sound of the lightsaber, which generally alternates between two frequencies, one semitone apart. This sound can be created with recordings of vibrating Electromechanical devices, synthesizers or with a pencil tool in an audio editor.
Buzz: A sound mixed in with the low hum to make it more electric and vibrant. It is created with either recordings of electromagnetic interference from a cathode ray picture tube, with a synthesizer, or drawn by hand.
Stroke: The short sound of a lightsaber making a swinging action, which is created by using a shotgun microphone to record humming and buzzing sounds coming from a speaker.
Idle: The sound of a lightsaber that is powered up, but fairly motionless. The idle sound is usually comprised of a mixture of the high and low oscillator sounds, either recorded with a microphone or mixed together in the DAW.
Clash: The sound of two lightsabers colliding, usually created with electrical zaps.
Ignition/Retraction: The sound of a lightsaber turning on and off.
DAW: Abbreviation for Digital Audio Workstation, a multitrack audio editor. Examples include Protools, Cubase and Nuendo.